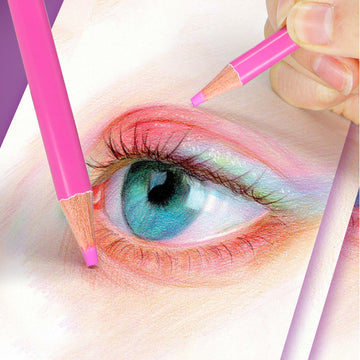
Colored pencils are a versatile medium for artists, allowing them to create beautiful and vibrant artwork. One technique that can take your colored pencil drawings to the next level is blending. Blending helps to smooth out colors, create gradients, and add depth and dimension to your artwork. In this blog post, we will guide you through some effective techniques to blend colored pencils like a professional.
1. Use a Colorless Blender Pencil:
A colorless blender pencil is a valuable tool for blending colored pencils. It contains no pigment and is designed specifically for blending colors together. To use it, follow these steps:
- Apply layers of different colors to your drawing.
- Use the colorless blender pencil to blend the colors together softly. Apply light pressure and small circular motions to achieve a smooth blend.
2. Layering Technique:
Layering is an essential technique in colored pencil blending. By layering different colors on top of each other, you can create subtle variations and blend them seamlessly. Here's how to do it effectively:
- Begin with a light layer of your base color.
- Gradually add layers of different colors, using varying amounts of pressure. The wax in the pencils will mix and blend naturally.
- Use a colorless blender pencil or a soft brush to further blend the colors together for a smoother transition.
3. Solvent Blending:
Solvent blending is a technique that involves using a solvent like odorless mineral spirits or rubbing alcohol to dissolve and blend colored pencil pigments. This method results in a more painterly effect and allows for smoother and more seamless blends. Follow these steps to try it out:
- Apply layers of colored pencil to your drawing.
- Dip a small brush or cotton swab into the solvent.
- Gently apply the solvent to the areas you want to blend, using small, circular motions. The solvent will dissolve the pigments and create a beautiful blended effect.
- Make sure to work on a non-porous surface and allow the solvent to dry completely before adding additional layers or details.
4. Burnishing:
Burnishing is a technique used to blend colored pencil layers and create a smooth, polished look. It involves applying heavy pressure to the pencil, filling in the tooth of the paper and creating a waxy surface. Here's how you can achieve burnished blending:
- Layer your colors as usual, building up the desired intensity.
- Once you have your desired colors, apply a white or light-colored pencil with heavy pressure over the entire area you want to blend.
- Continue the burnishing process by layering more colors and repeating the heavy pressure technique. This will result in a glossy, blended finish.
Conclusion:
Blending colored pencils can elevate your artwork and bring it to life. Whether you prefer the control of manual blending or the smooth effects of solvent blending, these techniques will help you achieve professional-looking results. Experiment with different methods, practice, and develop your own unique style. So, grab your colored pencils and start blending like a pro!

