How to Watercolor with Brush Pens for Beginners
Watercolor brush pens make painting with watercolors easy and fun, even for beginners! The flexible brush tip allows you to create textures and blending effects. With practice, you can achieve beautiful watercolor paintings using these handy tools. In this beginner’s guide, we’ll cover the basics of using watercolor brush pens so you can start creating your own artwork!
Getting Started with Watercolor Brush Pens
Watercolor brush pens have a brush or chisel-shaped tip filled with watercolor paint. When brushed onto wet paper, the concentrated paint dissolves into a wash of color. Here are a few beginner tips for using them:
- Choose pens with flexible nylon or synthetic bristles that taper to a fine point. This gives you versatility in strokes.
- Always paint on proper watercolor paper, which is thicker to hold up to the moisture. Standard sketch paper will warp and tear.
- Have a cup of water and paper towels or rag handy to clean and moisten the brushes.
- Be gentle on the brush tips to prevent damaging or fraying the bristles. Don’t press too hard.
- Follow the manufacturer's directions on care & drying to extend the life of your pens.
Basic Watercolor Brush Pen Techniques
Let’s go over some fundamental techniques that will help you as you learn to use these fun pens:
Color Blending
Overlap strokes of two different colors while the first layer is still wet to seamlessly blend the colors. This creates beautiful gradients in your painting.
Layering
Build up transparent layers of color to create depth and dimensions. Start light and add darker values overtop as it dries.
Details
Use the fine tip end of dual-tipped pens to add finer details, outlines, and calligraphy effects.
Texture
Flick, dot, and scribble the brush tip to create organic textures for things like foliage, petals, rocks, and water.
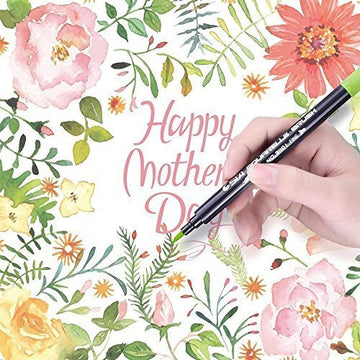
Creating a Floral Watercolor Painting
Now let’s walk through a simple floral painting using watercolor brush pens so you can see the techniques in action!
1. Sketch out the floral design lightly in pencil.
2. Use a light blue pen to base in the background, blending from top to bottom.
3. Paint the flower petals starting with light pink strokes, gradually layering in darker reds and purples.
4. Add yellow brushstrokes to the center of the flowers, blending outwards.
5. Define details like stems and leaves with green, adding texture.
6. Finish by outlining in black pen and signing your name!
The fluid nature of watercolor brush pens makes it easy to create washes,gradients, and blending effects. As you practice, you’ll gain confidence in using these versatile pens to bring your artworks to life. Doodle, experiment, and most importantly, have fun discovering all the creative possibilities!

