Metal Buttons 101: How to Choose the Perfect Style for Your DIY Projects
by yu zhang on Feb 18, 2025
Metal buttons are more than just functional fasteners—they’re tiny works of art that can elevate your DIY creations from ordinary to extraordinary. Whether you’re sewing a vintage-inspired jacket, crafting handmade bags, or upcycling thrifted finds, choosing the right metal button is key to nailing your project’s aesthetic and durability. But with so many styles, finishes, and sizes available, where do you start? Let’s break down the essentials to help you pick the perfect metal button every time.
1. Know Your Metal Types
Not all metal buttons are created equal. The material affects both appearance and longevity:
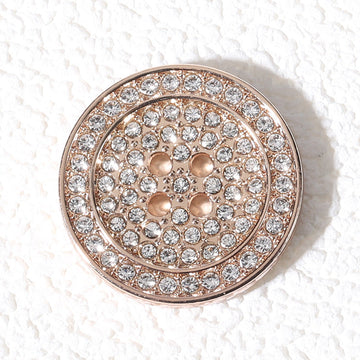
- **Brass**: Warm, golden tones that age beautifully with a natural patina. Ideal for rustic, steampunk, or vintage designs.
- **Nickel/Silver**: Sleek and modern, these polished finishes work for minimalist or industrial looks.
- **Antique Finish**: Distressed or oxidized metals add instant old-world charm to historical reproductions or bohemian styles.
- **Stainless Steel**: Rust-proof and ultra-durable, perfect for outdoor gear or high-use items.
**Pro Tip**: If your project will face moisture (like coats or bags), opt for rust-resistant metals like brass or stainless steel.
2. Size Matters
A button’s size should complement your fabric and design:
- **Small (10–15mm)**: Delicate buttons for blouses, cuffs, or lightweight fabrics like cotton or linen.
- **Medium (16–20mm)**: Versatile for shirts, dresses, and mid-weight materials like denim or wool blends.
- **Large (21mm+)**: Statement buttons for coats, jackets, or bags—ideal for thick fabrics like leather or tweed.
**Rule of Thumb**: The heavier the fabric, the sturdier and larger the button should be.
3. Shank vs. Sew-Through
- **Shank Buttons**: Have a loop on the back, creating space between the button and fabric. Perfect for thick materials (e.g., coats) or achieving a “floating” look.
- **Sew-Through Buttons**: Feature holes on the face. Best for lightweight fabrics and a flat, streamlined finish.
**Design Hack**: Use shank buttons on structured garments and sew-through styles for casual, breezy pieces.
---
4. Match the Aesthetic
Metal buttons can define your project’s vibe:
- **Vintage**: Opt for engraved brass, filigree designs, or oxidized finishes.
- **Modern**: Choose geometric shapes, polished nickel, or matte black metal.
- **Edgy**: Experiment with pyramid studs, spikes, or gunmetal tones.
- **Classic**: Stick to simple domes or round buttons in silver or gold.
5. Test Before Committing
Before sewing, place the button on your fabric and ask:
- Does it overpower the design or blend seamlessly?
- Does the color complement your thread and fabric?
- Does the weight feel balanced?
Final Tip: Mix and Match!
Don’t shy away from combining metal buttons with fabric-covered ones or adding enamel accents for contrast. For example, pair brass buttons with leather patches on a denim jacket, or use sleek silver buttons as minimalist accents on a linen tote.